
New article
Recently updated
Managing Workgroups

Who is this article for?Please Review Administrators managing workgroups.
Administration access will be required to follow this guide.
Nested workgroups in Please Review allow organisations to structure their review teams in a hierarchical manner, creating subgroups within larger teams. This feature enables efficient management of multiple levels of reviewers and authors, streamlining the document review process across complex organisational structures.
1. Managing Workgroups
1.1. Video
1.2. Steps
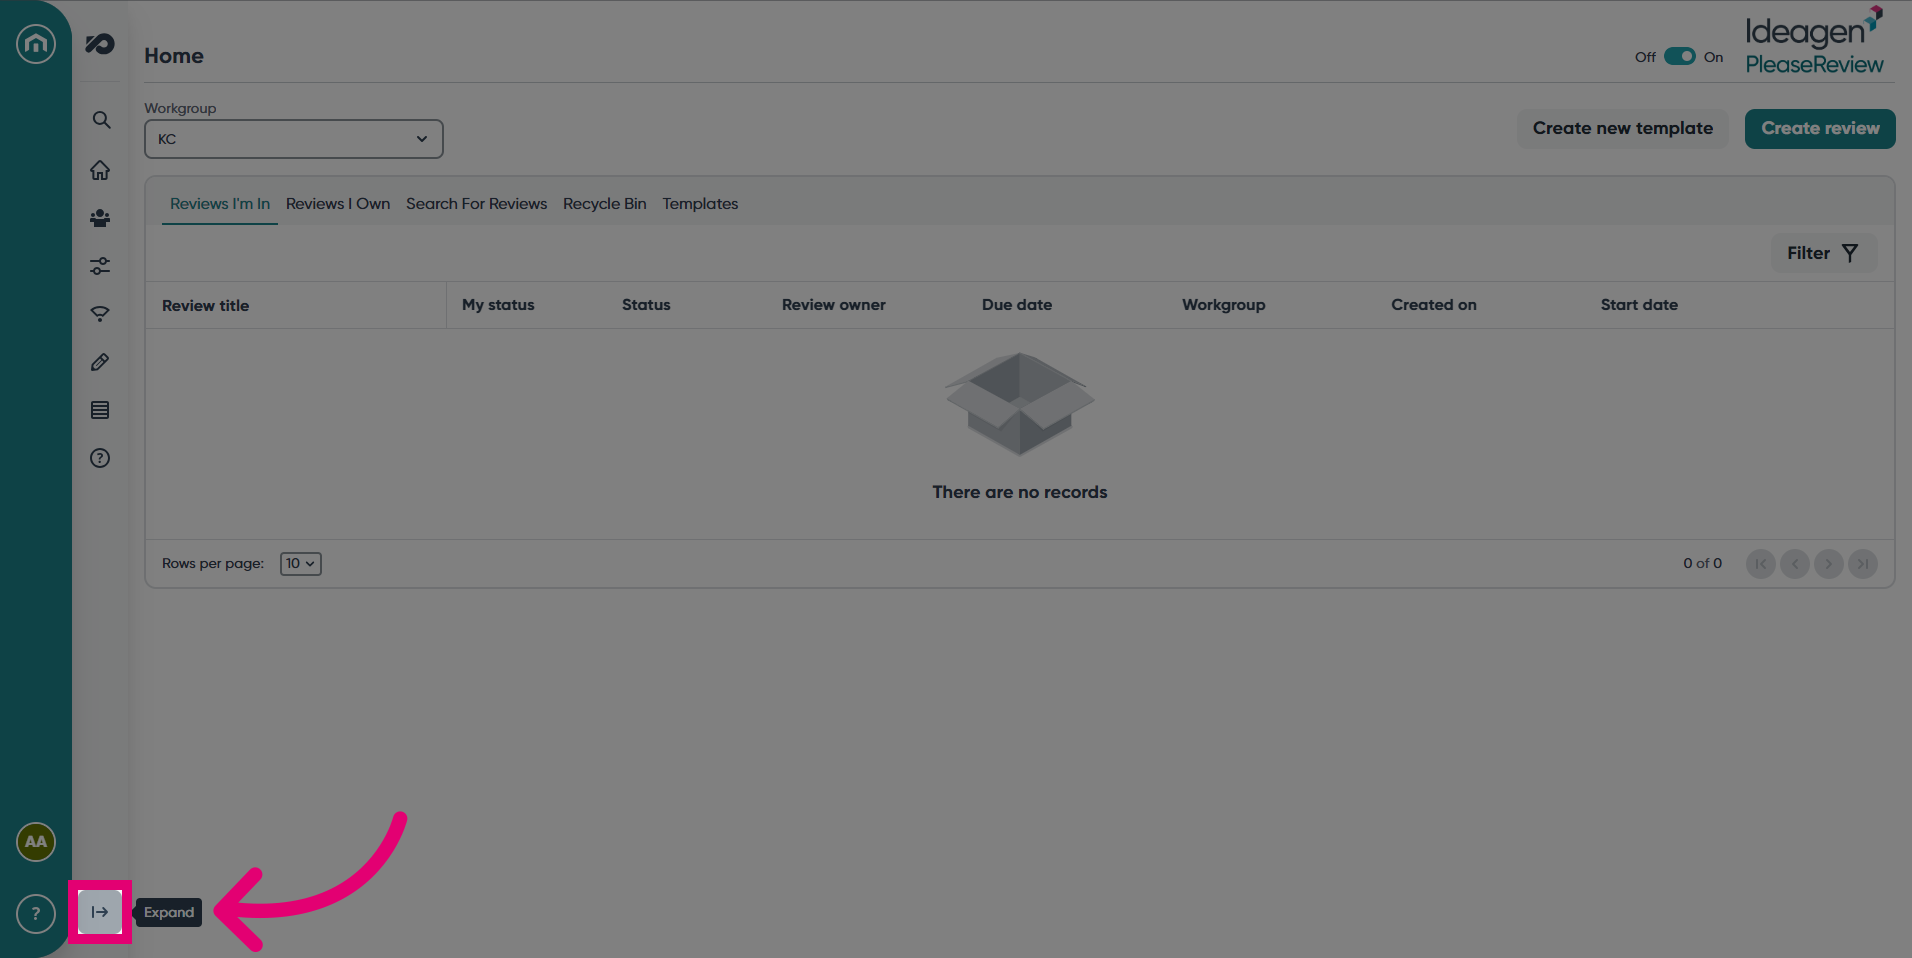
- Expand the navigation bar.
- Select the Admin drop-down.
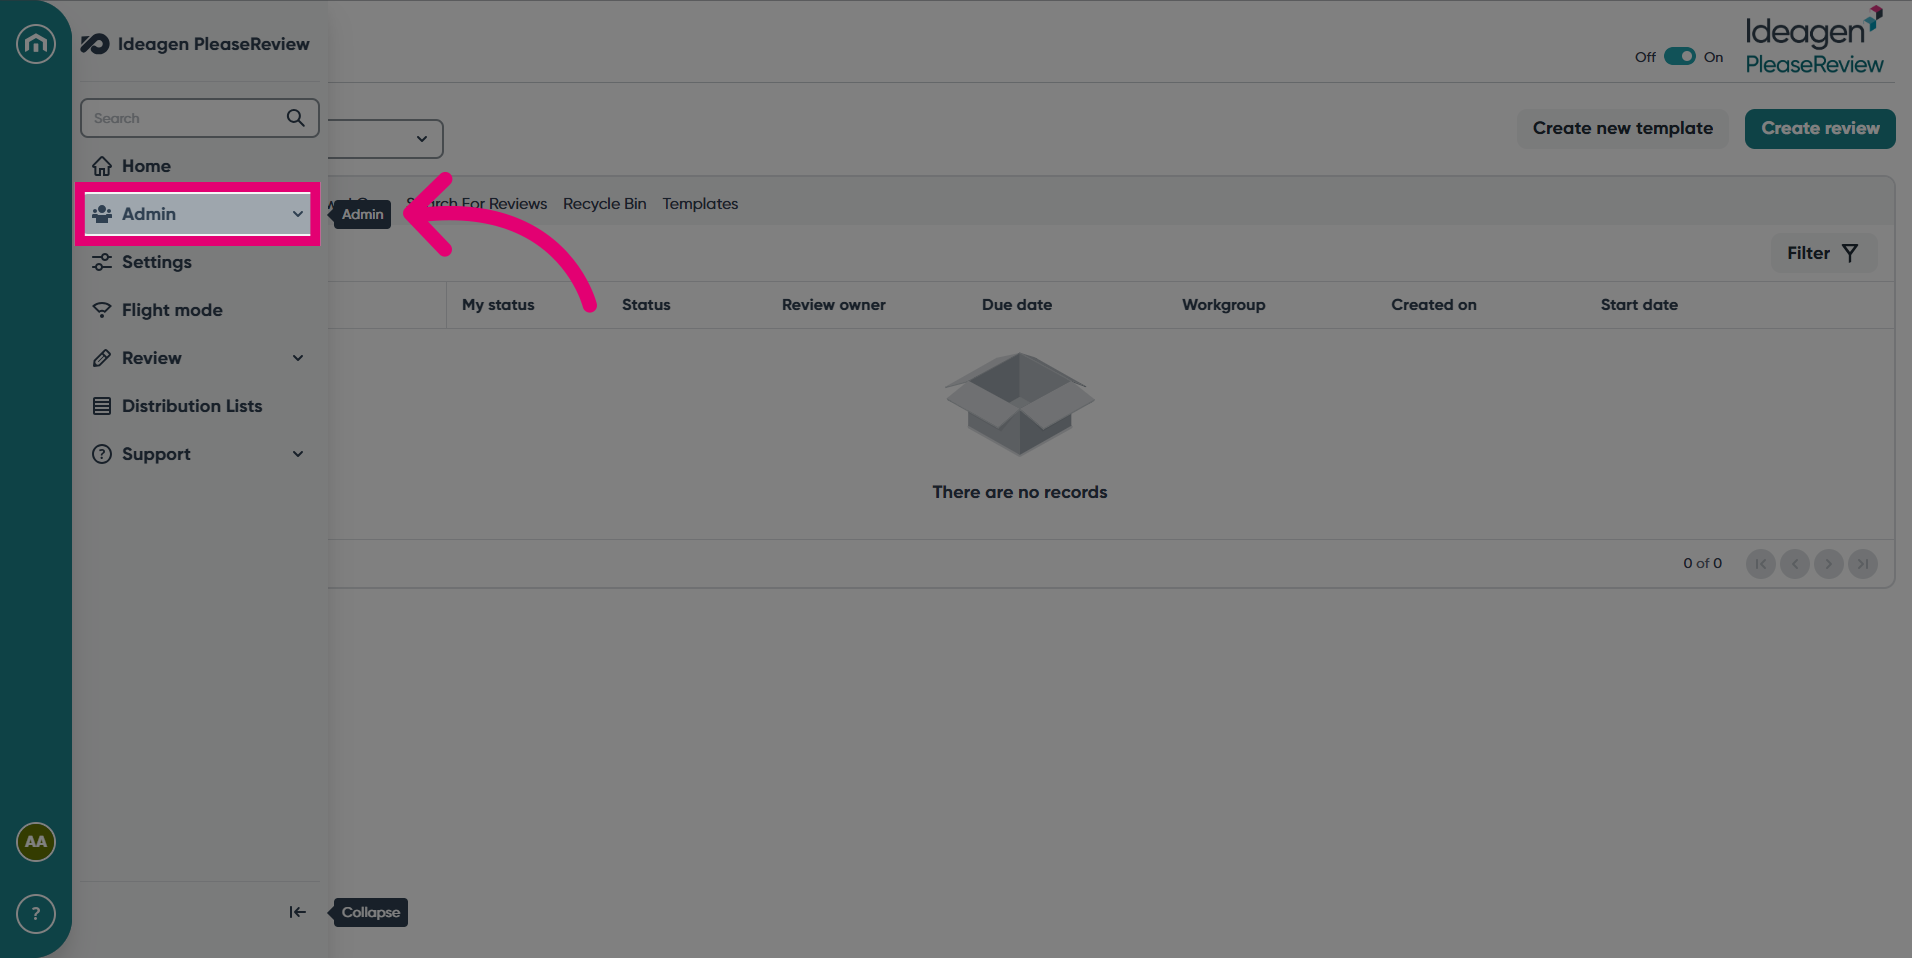
- Under Admin, click Workgroup Management.

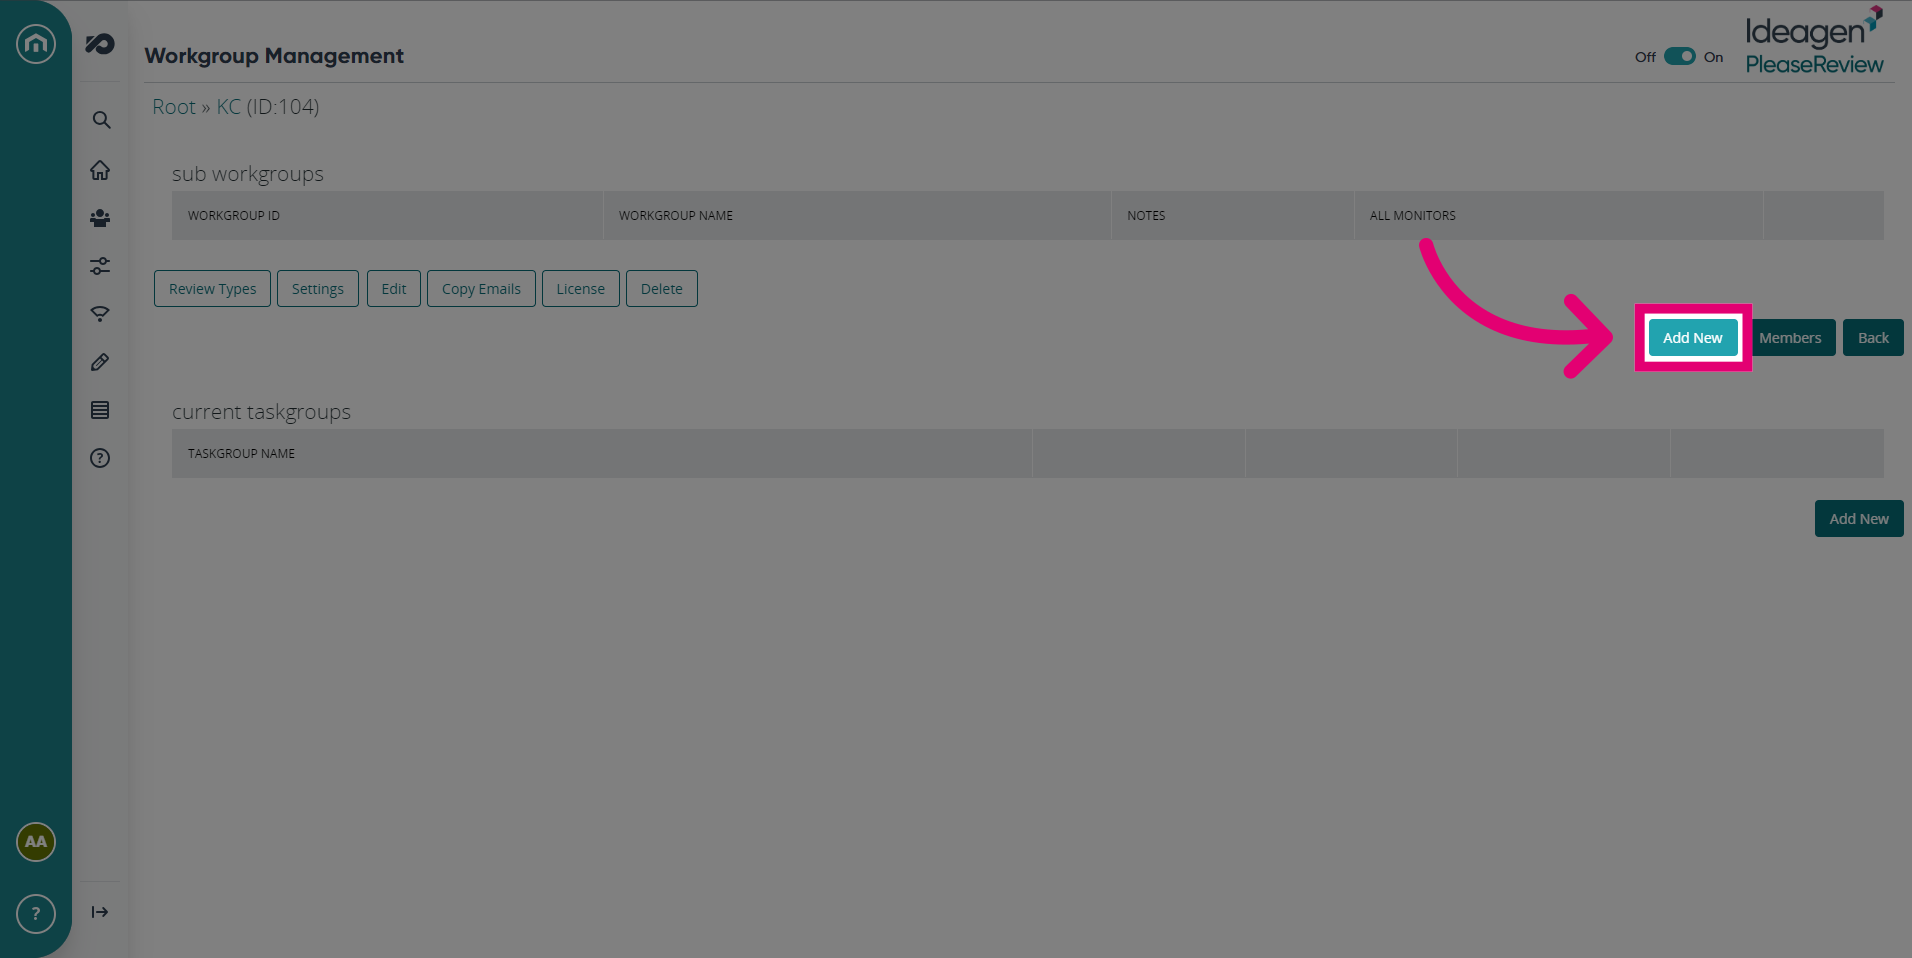
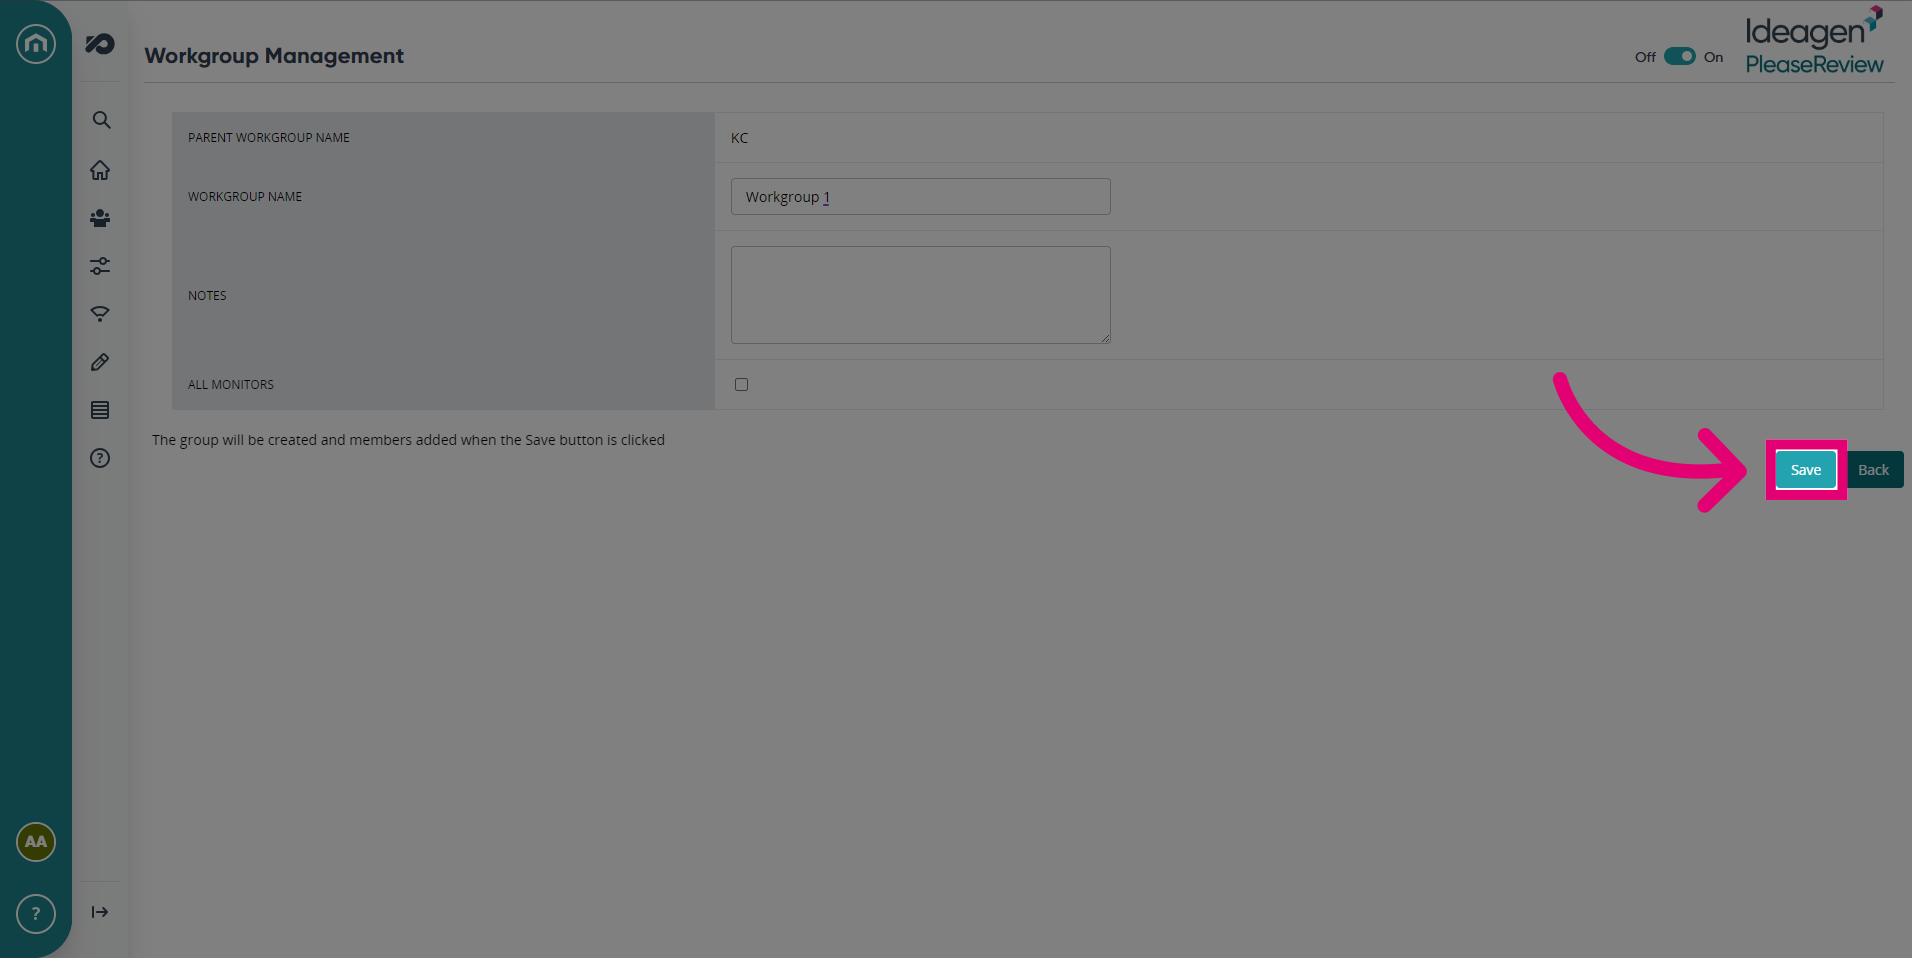
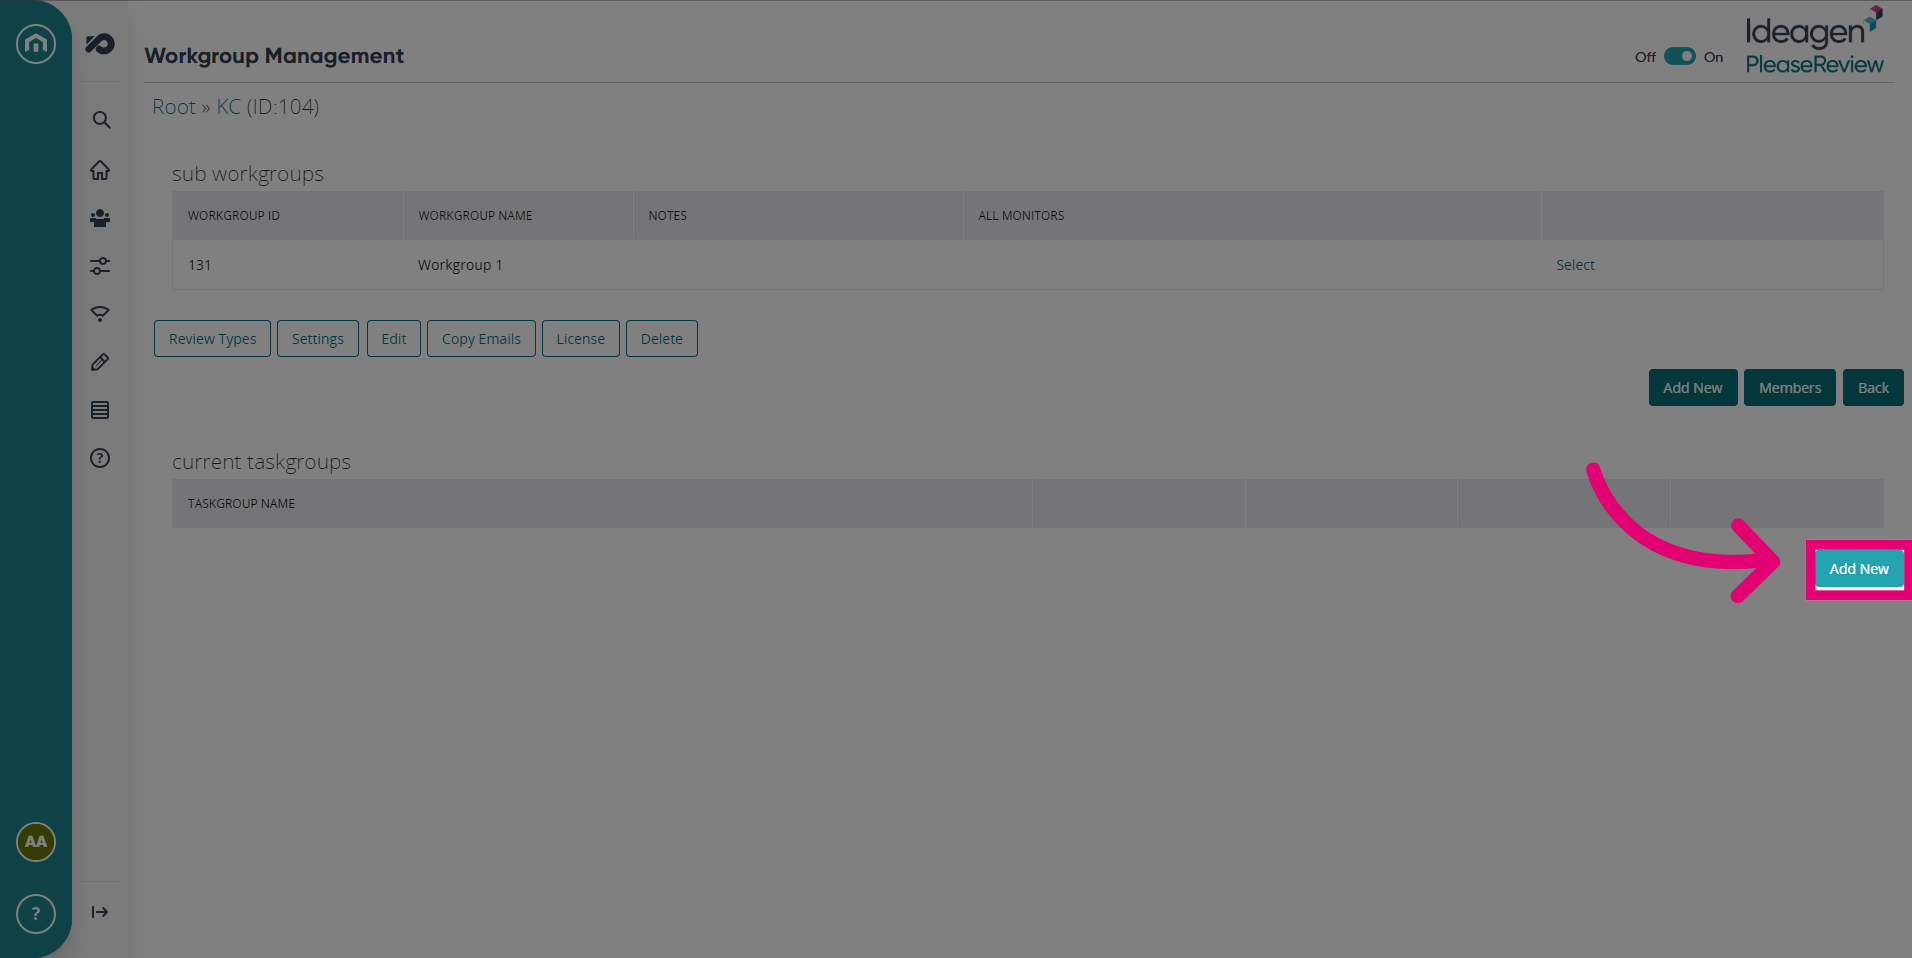
- There are two main actions in this screen. Adding new Workgroups and adding Taskgroups. There are other options such as Review Types, Settings, Licensing and more. Let's start with Workgroups, to begin the process click Add New.
- Fill in the details of your Workgroup such as the Name, Parent Workgroup and Monitors.
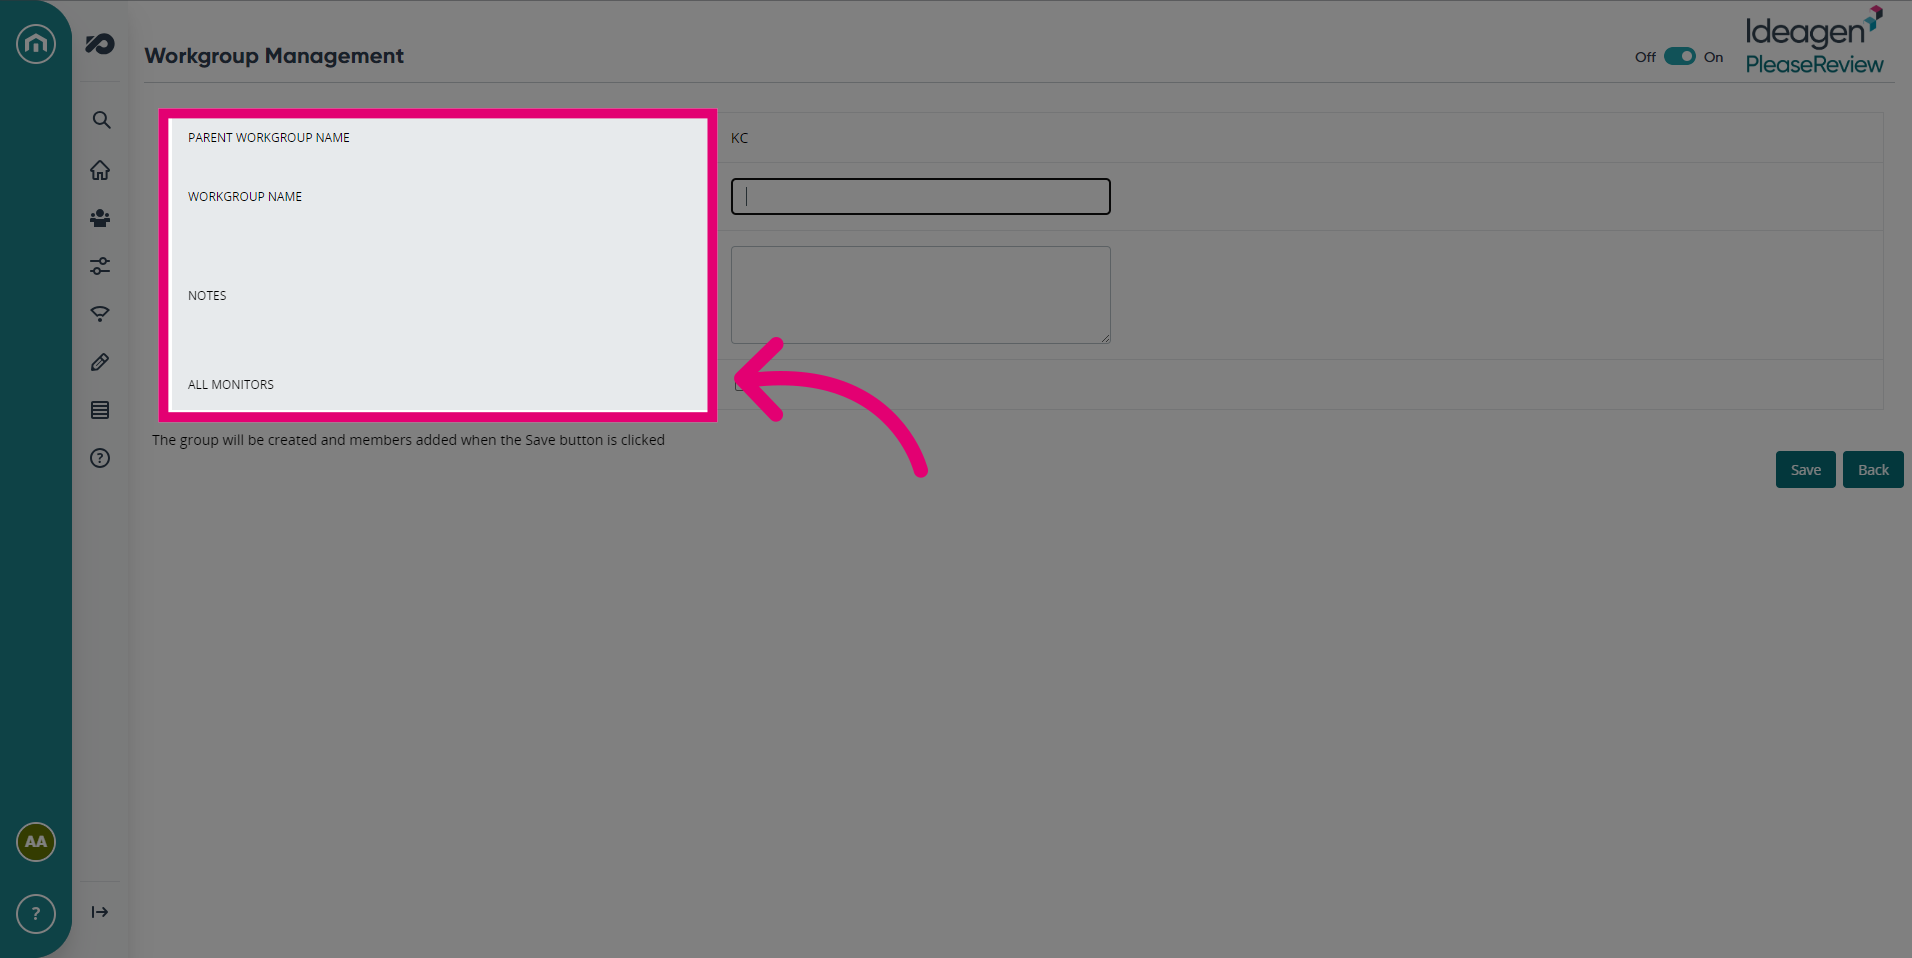
- Click Save once you've finished.
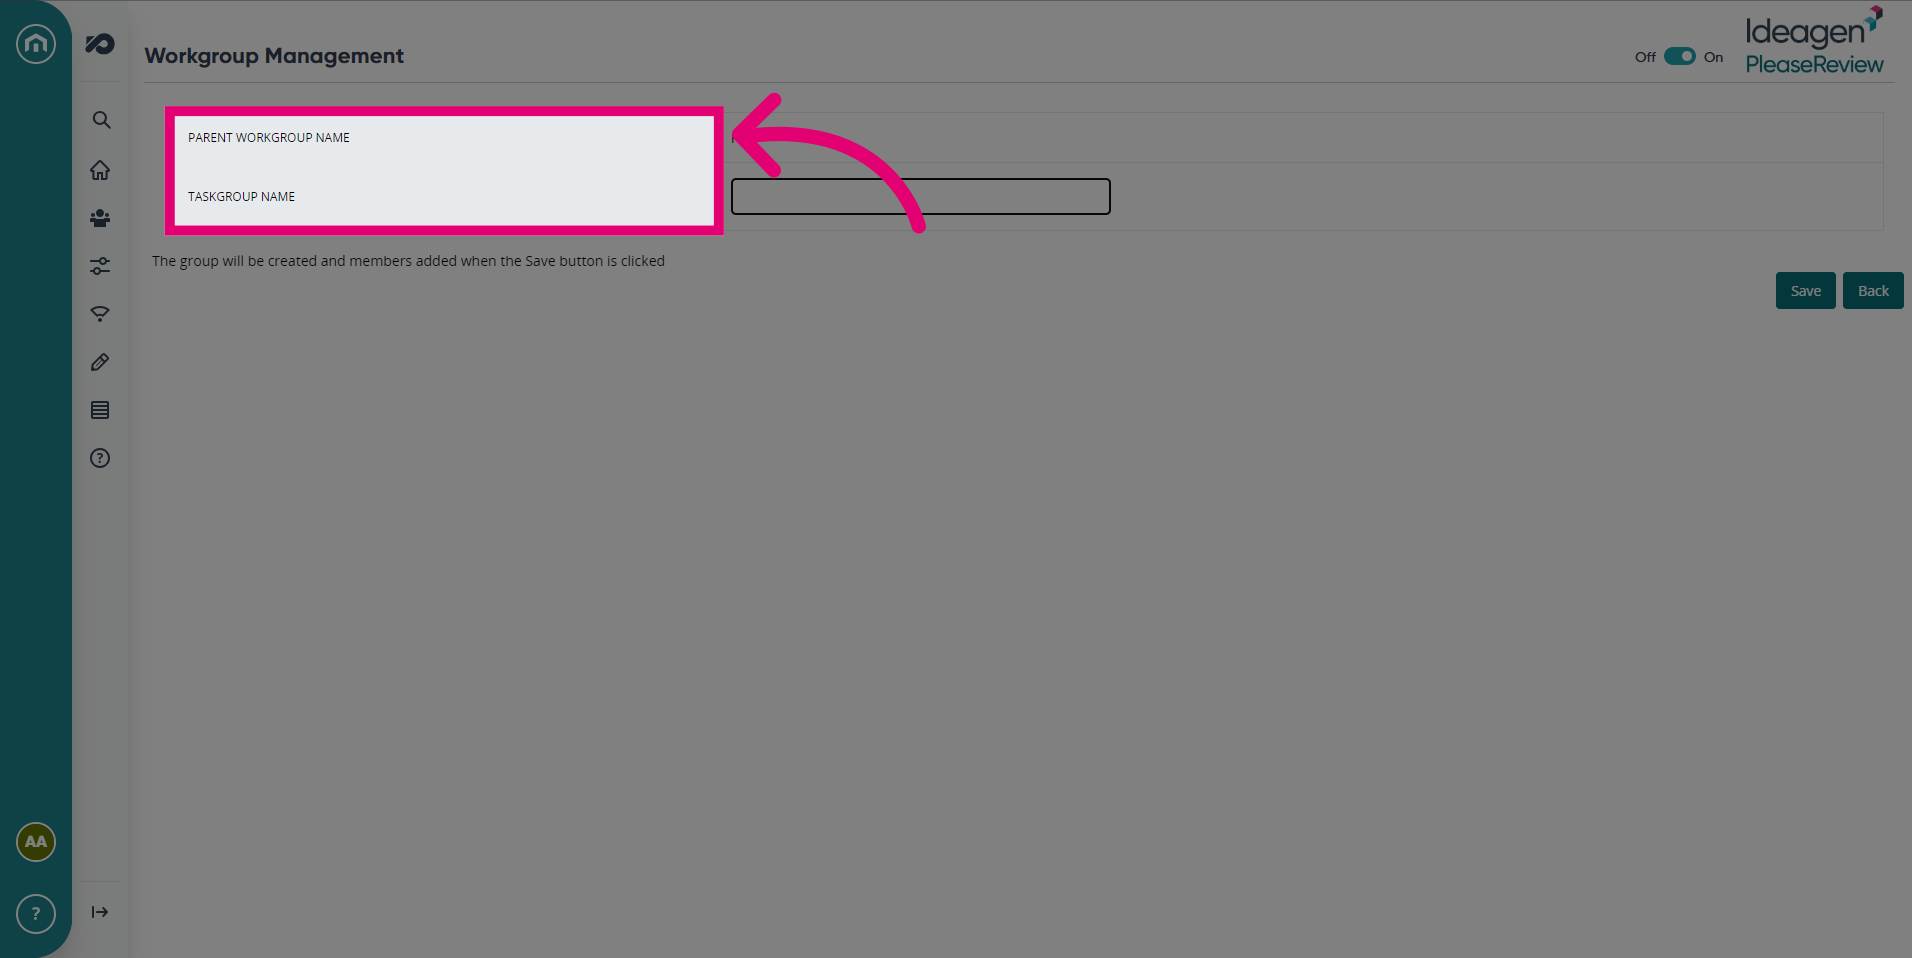
- To add a new Taskgroup, click Add New.
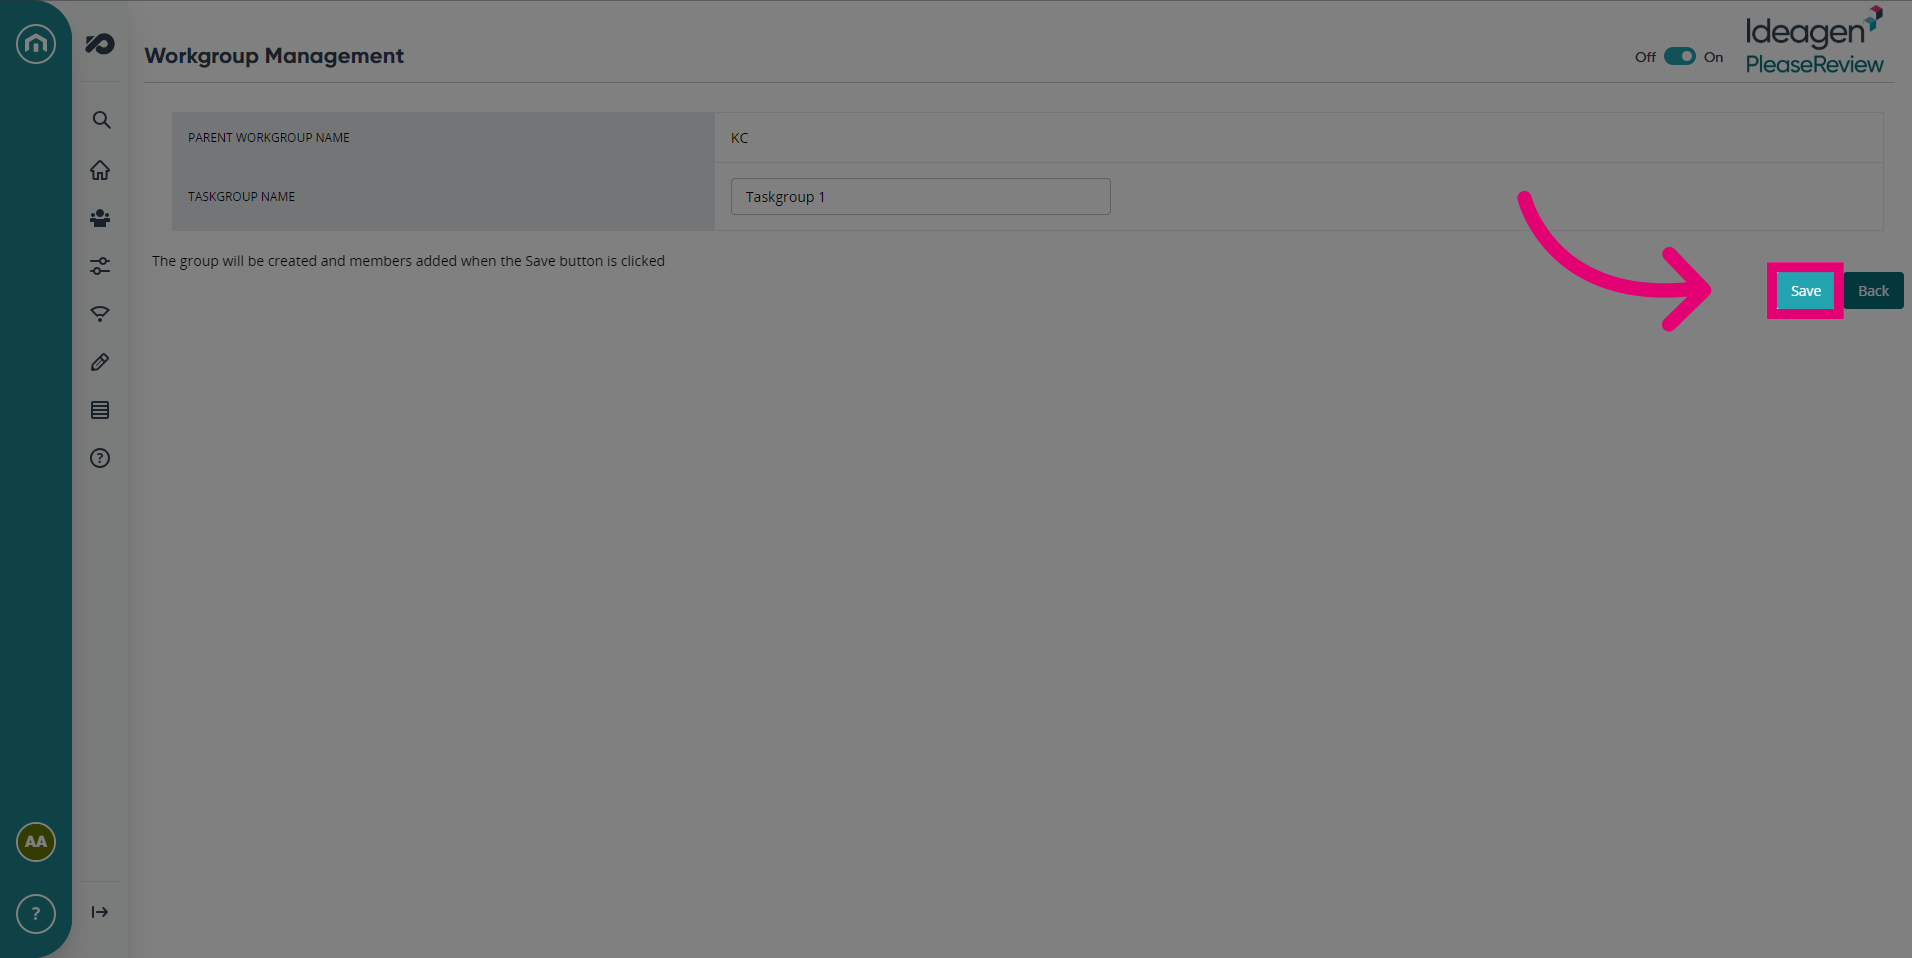
- Write in the Taskgroup name and Parent Workgroup name.
- Click Save once you've finished inputting the details.
Nested Workgroups
Workgroups are nested to form a tree structure with a single ‘Root’ workgroup at the top.
- You can rename the root workgroup, but it is still referred to here as the root.
- When you select ‘workgroup management’ from the left-hand menu you will see details of the current workgroup and all sub-workgroups:
- The ‘Root’ indicates the currently selected workgroup.
- To navigate down the workgroup hierarchy, click ‘select’ next to any sub-workgroup. The top line becomes a ‘breadcrumb trail’.
- To navigate up the hierarchy you can click on any ancestor workgroup here. There is no visual indication that a workgroup has another level of workgroups beneath it.
- This only becomes apparent when you select a workgroup and ‘open’ it.
Important: When there are complex tree structures of workgroups, it is recommended that a separate record be maintained.
When the system is initially installed, there will only be the root workgroup and no sub-workgroups, so the list of sub-workgroups will appear empty, and it will obviously not be possible to navigate at all.
The other controls available on this screen are:
| Control | Description |
|---|---|
| Members | to see and manage members of the selected workgroup. |
| Add new | to create a new sub-workgroup of the selected workgroup. |
| Review types | to manage review types associated with the current workgroup. |
| Settings | to manage configuration settings for the current workgroup. |
| Edit | to edit the name or notes for this workgroup. |
| Copy emails | shows a list of the email addresses associated with all members of this workgroup that can be pasted into an email client. |
| License | to create and manage sub-licenses |
| Delete | deletes the currently selected workgroup. This button is only visible if the workgroup has no sub-workgroups. |
Sub-workgroups:
A sub-workgroup is any workgroup created hierarchically below the 'Root' workgroup. These can be used to split out your business into departments and departments into teams. You can then use workgroup settings to tailor your end user's experience based on which workgroup they're in. This can be useful if, for instance, you have users external to your business that may have different needs or functions for the system or to customise your security to ensure that external users only receive specific permissions.
Creating a Sub-workgroup:
- Open the 'Admin' tab of Please Review.
- Select 'Workgroup Management' on the left.
- Ensure the workgroup at the top of the screen is the one you'd like to be the parent of the new sub-workgroup.
- Select the 'Add New' button.
- Configure the workgroup
- Click 'Save' once you've finished.
Edit a Workgroup
- To edit a workgroup, click on ‘workgroup management’ under ‘admin’ on the left-hand menu.
- The 'workgroup management' screen will be displayed (as seen above).
- Click on ‘Edit’ to the right of the workgroup the 'editing workgroup’ screen will be displayed.
Note: To edit a workgroup name, simply change the name and click on ‘Save’.
Deleting a Workgroup
To delete a workgroup, use the workgroup management screen to navigate to the workgroup you want to delete and click the ‘delete’ button. A warning message will appear - click ‘OK’ to delete the workgroup.
Note: If there are sub-workgroups, the delete button will not appear.